Sunday, March 27, 2011

Flower Making Tutorial and Card

I mentioned in a previous post that I would do a flower making tutorial.  I should say right up front that this is not my original idea.  I have seen many other designers making their own flowers and some have tutorials such as StampARTic.  Most of us take what we see others doing and put our own twist on it, and this is what I have done with a Crafting Passions tutorial.  So here goes......


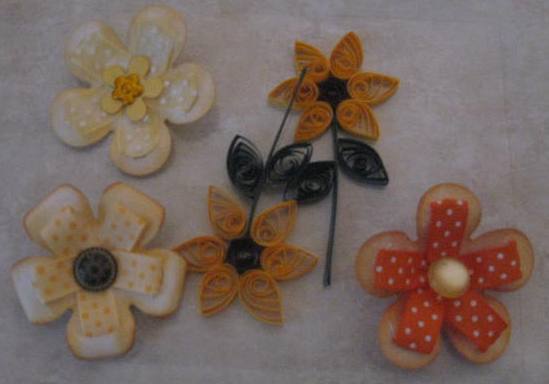
The yellow flowers were made using the new Heartfelt Creations/Spellbinders Posy Patch die.  Heartfelt Creations has a number of lovely stamps that coordinate beautifully with new Spellbinders dies that were made specifically for their stamps.


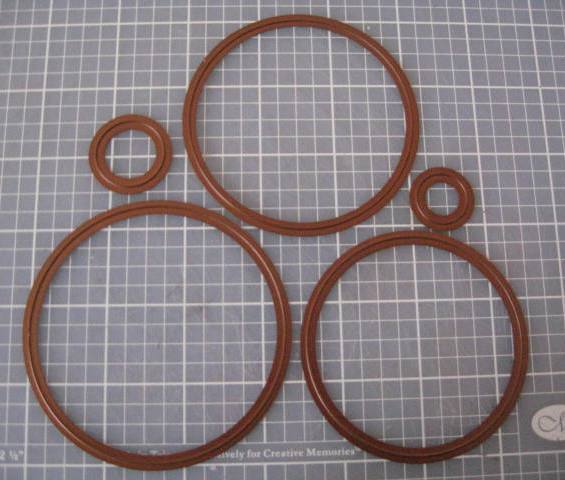
The other flowers were made with the EK Success Retro Flower punches in small, medium and large.  In reality, any flower with individual petals will do (I think the Cricut has a flower that would work).


For the larger flower you will need 3 - 4 large pieces, 3 medium pieces and 2 - 3 smaller pieces.  The finished product will look more full-bodied with more layers.

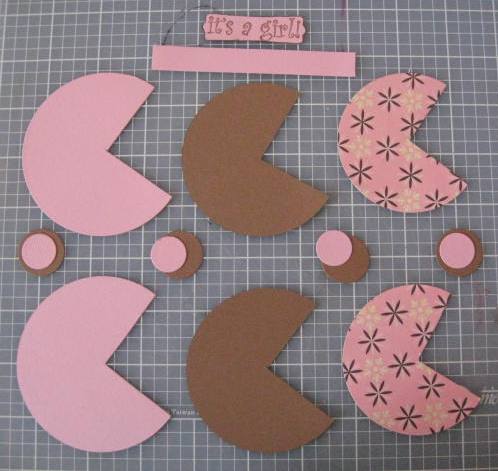
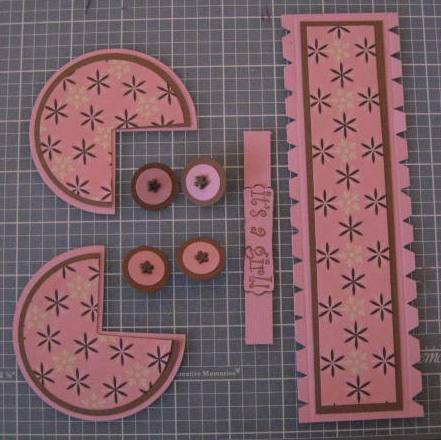
 After cutting the flower pieces you may choose to color the edges, or you might want to give the pieces your own design by sprtzing with inks.  Just be sure that the ink you choose is waterproof because we will be saturating the paper with water.

 
Stack the layers on top of each other slightly rotated so that each successive layer can be seen.  Now you need to connect the layers to keep them together.  For the purposes of this tutorial I used brads, but you might want to sew on a button as an alternative.  It just depends on whether you want to see the center in the finished product.  I kept the brad hidden for most of my flowers.

 Once the layers are held together, spritz the whole thing with lots of water.  You may need to gently lift the petals to spritz the individual layers, and don't forget the bottom.  You want the paper VERY wet!  The purpose of this step is to make the petals pliable. I usually let it sit for about 5 minutes to really soak in and then spritz again.

When you are ready, start with the center and pull up one round of petals.  Squish them together, push down a bit, twist, and then pull up again.  You're distressing the petals in your own unique way!  Be careful not to pull to hard because the petals may come loose from the flower during this stage.

Continue pulling up rounds and distressing them until all the petals are in their upright position.  Spritz with water again if you feel the paper getting dry.  Now wait a bit - this is the hardest part for me.  Let the paper rest and begin to dry naturally.


The next step is to carefully peel back the layers starting from the outside.  Shape them as you go.  You can use a tooth pick, knitting needle, shop stick or some other round tool to roll the ends of the petals. Sometimes, just your fingers will do.

When you have the flower petals positioned just the way you want them put it down and let it dry all the way before using it on a project. As the flower dries you can work on the shaping a little more, but I have found that less is more in the case of these flowers.

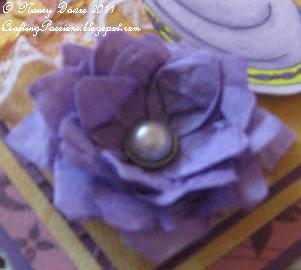
Once the flower is completely dry it will be stiff and hold its shape. At this point you can use it as is or add more embellishment such as crystal lacquer to make it shiny, or Stickles for a special sparkle, or even air brushed to add more dimension.


When I made the smaller flowers I included a couple of layers of green paper to simulate leaves. Cut, layer, water and distress in the same manner.


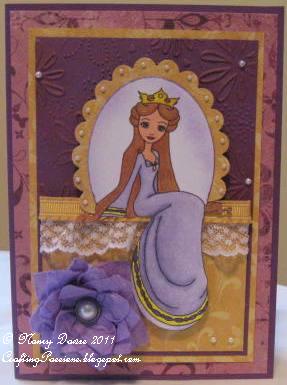
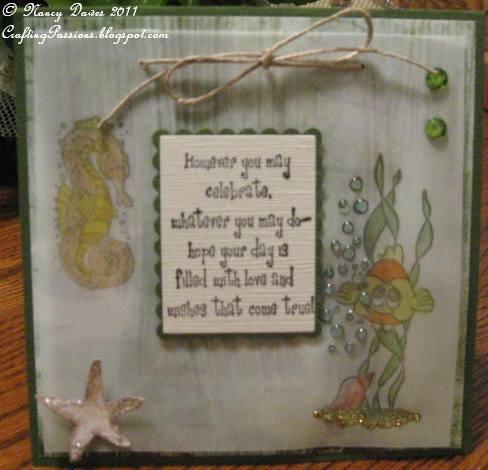
Now on to the card I made using my new flowers.  The Tilda image is from the new Magnolia collection colored with Copic markers.


I added a little FlowerSoft to the bunny’s tail for some fluffiness. The gems are from the dollar store. Designer paper is the last bit of my Amor left over from a previous project and I think the card stock is from SU - Rose.  Spellbinders oval and scalloped oval set the scene for Tilda.

This card is entered into the following challenges:

Totally Gojuss - Spring
Outlawz - Sketch challenge
Simon Says - for a girl in your life
Aly's Sunday Sketch - Spring
Creative Inspirations - Flowers

Thanks for checking in. I hope this tutorial helps you make your own beautiful flowers!

Have a GREAT day!


Friday, March 25, 2011

Spring Has Sprung!

My dafodils are finally displaying their color in all their glory and it is such an encouraging sight!  I know parts of North America are still struggling with snow but in the North West it is sunny and approaching 15 Celsius - almost balmy after our super cold days earlier this month.

Most of the blogs are cellebrating Spring so here is my card in answer to some of them.


The card base is Rose from Stampin Up and the designer paper is from some of the new stash I purchased last weekened meeting my blog friend - My Mind's Eye, Life Stories Lavender Plaid.  I think the ribbon might be Bo Bunny but I am not sure because I bought so many that day.  The bling actually came from the dollar store!


The image is from the new Magnolia collection that I received in my subscription last month.  I used Copics: YG21, YG23, YG25 for the little leaves and G07, G14, and G17 for the larger leaves and grass.  The pink flowers are RV21, RV23 and RV29.  The wood is E35, E37, and E59.  Then I used the blender pen to work in some lighter streaks.


 This great verse if from my Our Daily Bread Designs Scripture Collection #3.  I am looking forward to getting my order of new verses in the mail soon! Spellbinders scalloped hearts completes the scene.


This new flower (just made today) is something that I have been working on for awhile, trying to perfect the technique that I saw on the StampARTic blog.  I'll be doing my own tutorial soon!

I am entering this card in the following challenges:

ODBD - new to you (paper, ribbon, image)
Just Magnolia - bingo (gems, flowers, ribbon)
Outlawz - Spring


Well, I think I might have to go pull weeds if it gets any warmer. 

Happy Stamping!

Thursday, March 24, 2011

New Baby Girl!

One of our staff members just had a little baby girl and I needed to make a card to give with our gift.  I wanted to do something a bit different and I had seen a little paper carriage somewhere in blog land. 


I think that blog had a cutting layout, but since I can't remember where it is I needed to come up with my own pattern.  I wanted to use the tools available to me and I was not about to cut out the pieces by hand (bad idea!).  So, I used my Cuttlebug and Spellbinder circles to do the work for me.

I have both the small and large circles, which came in handy.  I used the 3 1/4, 3, 2 3/4, 1, and 3/4 inch circles to cut the base and two layers of designer paper.


After cutting the two base circles I needed to find the center of each and cut out 1/4 of the circle.


The carriage backing is cut from the same card stock at 2 1/4 by 7 3/4 and scored at 1/4 inch on both of the long sides.  To make it fit better around the circle you will need to cut out little triangles along both edges near the score lines as shown.
Carriage Base Pieces
Next I cut out my coordinating and designer papers.  The handle is a little piece 3/8 by 4 inches.  You can make it thinner or wider depending on the sentiment you want to use.

 Next, I layered all the pieces and began the construction process.  I quickly found that the backing strip needed to be made with really strong adhesive, so be sure to use something like Scoretape instead of a glue runner. I placed the Scoretape on the circle instead of the backing strip.

Working with one side at a time, gently ease the strip around the edges of the circle and press firmly to make it stick.  Make sure that your two edges line up for a clean seam.

After I had the base put together I attached the wheels with brads, then added my embellishments of pearls, lace and a ribbon.


We are going to slip a gift card for baby supplies into the carriage and deliver it this weekend.

Have a go at your own version and let me know how it turns out.

Happy Stamping!

Sunday, March 20, 2011

Meeting New Friends

Shortly after starting my blog in January I met (on line) a fellow blogger and card maker Sheree who lives just 30 miles north of me in Campbell River.  After looking at blogs from all over the world it was cool to know that there was someone else doing this who lived close.

So anyway, we resolved to meet someday and that day was Saturday!  Sheree and I met at a SB store in Campbell River, She Runs With Scissors.  What a great store!  If you ever make a trip to Victoria BC you'll have to take a day trip up the island and check out all our great SB and stamping stores. Contact me and I would be happy to give you a list and personal tour.

Well wouldn't you know meeting Sheree was like meeting a long lost friend.  Sheree brought some of her Stampscapes cards to show and it is a good thing because they are soooo beautiful.  The pictures on her blog are great but they don't do justice to the real thing.  We exchanged little gifts too.  I gave Sheree some of my new paper flowers that I am working on and a couple of my quilled sunflowers .....


I had a great time and it was very cool to meet a fellow blogger in person.  I also made a great haul at the store and added to my bling stash, found some amazing designer paper, as well as a couple of really cute stamps.  Here is a card I made with some of what I found at She Runs With Scissors.

I just love this Basic Grey Curio dp.  The flowers are a lovely peachy color and surely helps me work through all this rain in hopes of a nice Spring day.  The image is Kiki LaRue from C.C. Designs.  I used my new EK Success Retro Flower punch to make the little buds and used some coordinating Basic Grey brads to finished it off.

Reach out to someone new and make a friend.  I highly recommend it!
Have a great day!

Thursday, March 17, 2011

Princess for a Day

My card for the Totally Gojuss challenge uses C.C. Designs Sweat November Arabella colored with Copics and framed inside a Spellbinders oval on a bed of lace.   I love this image!  It is going to be perfect for my little grand daughter's birthday as she dresses like a princess most days and certainly is her dad's princess. 

Arabella is surrounded by SU pearls and the hint of flowers from the Cuttle Bug embossing folder.

 The paper is from So Sophie - Open Your Heart - Royal Paper.  Such fitting dp for a princess!  I used Copics BV0000, BV000, BV00 and a hint of V17 for the dress.  I also air brushed the oval to give a gentle frame to the beautiful Arabella.

The royal flower was made with mulberry paper using Becca's folded flower.  Check out her great video instructions.  I only used the smallest 3 sheets as this size fit best with the card.  The brad is from My Mind's Eye.

This card was also entered into Aly's Sunday Challenge.

Well, I have to get back to work.  I just took a break to post this card.  I'll have more tonight as I am working on something for a couple more challenges.

Happy Stamping!

Saturday, March 12, 2011

7 Kids College Fund Challenge

I am definitely having fun this weekend catching up on my card making.  I Copic colored a few images while I was away and this little C.C. Designs Sweetheart is one of them.  She gets entered into the 7 Kids College Fund challenge.  You have to use one of the images they sell and fortunately they sell C. C. Designs.


I have been in kind of a green mood lately (I guess that is a desire for Spring) and colored a few of my images with a variety of greens.  For this one I used YG21, YG23 and YG25 along with some browns.  The flowers include one of my Sizzex 3-D flowers and a couple of Prima.

Oh yeah, got a new punch from Martha Stewart - the green sprig.

Happy Stamping!!

Black and White

I made a little card for the Cupcake Craft Roon Challenge this month.  The theme is black and white.  Funny, this theme, people used to tell me I was as black and white thinker.  Fortunately, not so much any more - age has a way of mellowing us a bit.


The designer paper is from Momenta - Story of Us cardstock pad.  The layered frames and sentiment is from JustRite Baroque Nested Frames.

I have a couple more cards made and ready to post through the weekend.

Happy Stamping!!

Friday, March 11, 2011

Making Cards Again

Hi everyone,

I have had a bit of a dry spell being away on holiday and then coming back to a mountain of work to catch up on.  Well, last night I couldn't take it anymore and made a couple of cards.

First, let me show you the Magnolia package that arrived when I got home.  I subscribed to the Magnolia stamp club late last year and have just received my second shipment. I can't wait to stamp these images and see how cute they are and make them up into cards.


The other piece of news is about a wonderful lady I met at the ceramic table in Cancun.  She is actually from Texas but living at least part time in Mexico.  One of the things she does is arrange weddings for Americans while in Mexico and she asked if I made wedding invitations.  Well ya'know any of us card makers can make wedding invitations.  Her next one has a seahorse theme so I made up a sample card, not as an invitation but just a card .....
I added Stampin Up's Crystal Effects to the bubbles, and
a little bit of gold Stickles to the sand.
You can see the sparkle on this picture a little better than the standing image.

The card base is Bazzil layered with Creative Imaginations designer paper.  I stamped the SU seahorse from a set I got back in 2003 (can't remember the name).  The other image is Great Impressions.  I stamped them both onto Velum paper and then Copic colored the back side of the velum.  It produces a subtle effect but still maintains the vibrancy of Copic markers.  The sentiment is from another SU set from 2001.

I entered this card into Penny's Paper-Crafting Challenge #48 and MelJens Designs #49.

Well, I need to get going.  There are challenges to enter and many more cards to make.

Have a great day!!


Sunday, March 6, 2011

Stylish Blogger Award

Wow, this world of blogging is fun,exciting and full of surprizes!  I just returned home from two fabulous weeks in Mexico. Here I am at the hotel making a ceramic plate, painted in the Mayan style.  I had to keep connected to crafting evan while enjoying the sun and sand down south.


I returned home to learn that I have been awarded a Stylish Blogger award.  Thank you Sheree for thinking of me.  I love your stampscapes cards and your blog.  It's full of information and links to lots of blog candy!  I also love that you are close - just about 30 minutes away in Campbell River.  I hope to meet you in person some day.


So, I am supposed to tell 7 things about me and then pay this award forward.......

1. I am passionate about my family - I have four grown children and five grandchildren.
2. I am passionate about my relationship with God - we attend Central Evangelical Free Church.
3 I am passionate about my dog - "Sasha" a 6-month old Yorkshire Terrier.
4. I am passionate about my work - I work as a Business Analyst for the BC provincial government.
5. I am passionate about making cards and stamping - I have been making cards since the 80's (thanks mom!) and just started blogging in January.
6. I am passionate about knitting - I have a small knitting group on Tuesday nights that has been meeting for the last 9 years.
7. I am passionate about learning new things! 

Here are a few other bloggers who surely deserve this award:
  • Roxie - she has a wonderful site with fabulous cards and tutorials.  She is also a DT member for a couple of companies.
  • Tracy - she is a fellow Magnolia lover!
  • Linda - a fellow grandma and great card maker.
  • Janeen - a blogger of more than cards - I just got a great bread recipe!
I could go on and on with the blogs that have shown me great cards, tutorials and that something extra that deserves to be called a Stylish Blogger.

Thanks Sheree,
Nancy

P.S. Tomorrow I will post a card!