Wednesday, April 6, 2016

Wedding Album with Graphic 45 Mon Amour Collection

I have been waiting patiently to show you this beautiful album I made for my Niece and her new hubby. I finished it several weeks ago, but I could not share it until I presented it to her because she follows my work too.

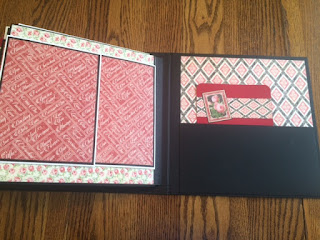
Here is the cover ......
I cut the signature page down and glued the edges to the cover.
This allows for tags and pretty ephemera to be inserted.
Of course with this lovely vintage paper I had to add some lace.
I used a tutorial from Paper Phenomenon, the Traditions Genealogy Scrapbook.  This tutorial was very easy to use and makes a great "larger" mini album.  Here is the inside front cover......


This is the inside front cover with Insert #5 tucked in the pocket from the Photo Mats and Inserts #1 tutorial. I added Spellbinders heart die cuts to add the names of the Bride and Groom.

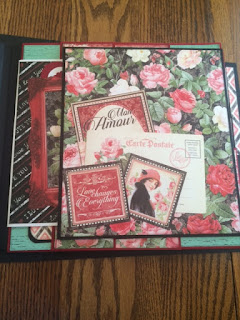
Page 1 front, inside and back.......


This album is perfect for 8x10 and 5x7 photos as well.

Lots of room to add 4x6 photos without trimming!

Back of page 1

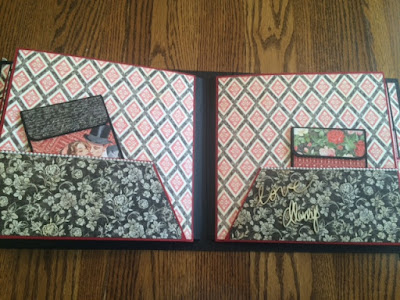
Soooo many flaps and pockets!  Lots and lots of room for photos and memorabilia. Here's page 2......


Back of page 2

Inside page 2
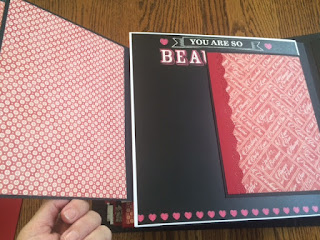
This project took quite a bit of paper too.  I used most of two 12x12, two 8x8, and one 6x6 pads. The ephemera pack and Prima flowers rounded out the embellishments. Here is page 3 .....


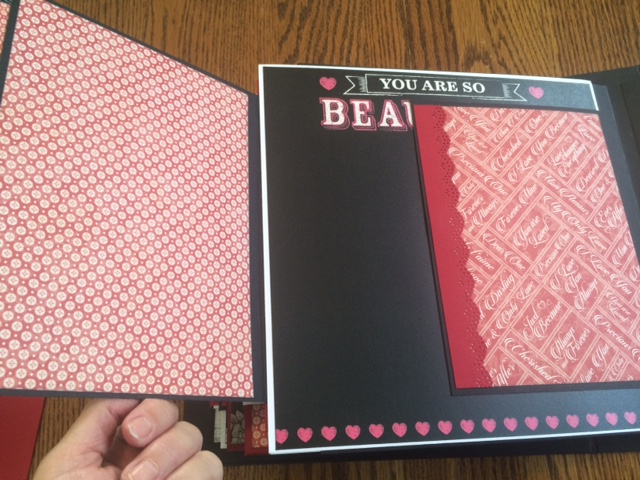
Back of page 3 is the centre of the book with two facing pages the same.  I slipped in a couple of Photo Mats from Tutorial #1.


This is the back of page 4 and start of page 5.....


Page 5 .....


Oops, this one is upside down!

Look at all those tags for pictures!
This one is the back of page 5 .....


Page 5-6 spread .....

Under the covers of page 6 .....


Back of page 6 and the inside of the back cover .....


Whew! That is a big scrapbook!

My niece loved it and now needs a little help getter her pictures into the book.  I guess I might be persuaded to make it back to San Diego for a visit as long as the weather is nice.  Hope you enjoyed my latest scrapbook project using a Paper Phenomenon tutorial.

Have a scrappy day!
NancyD


Friday, February 26, 2016

1st Art Journal Pages - Oh My!

2016 is my year for taking on-line art classes and learning new techniques. I want to venture deeper into art and begin to understand the process of art journalling.

After taking Jane Davenport's Supplies Me class I have gathered many of the products that are needed, such as gesso (white, clear, black), gel mediums in both gloss and matt, a variety of acrylic paints and of course watercolour paints.  Thanks to all my stamping and card making years I have plenty of paper, pens, markers and embellishments.  So I am off and running......


I picked up an 8x8 watercolour journal - the hand book paper co (Global Art Materials) from an art store in Nashville (I was just there for a conference).  

  • Started by applying raised sections of wild flowers and random shapes on the page with several stencils and modelling paste (Tim Holtz and Balzer Designs)
  • Added a light wash of three colours.


Okay now the real fun begins....
  • I wanted lots of colourful flowers so I dabbed acrylic paint onto a large Donna Downey stencil in both red and green (then added a little bit of yellow).
  • I outlined all the flowers and stems with a xs Pitt Pen.  I tried to smudge it but it didn't really work.
  • Next I randomly added some stencilled words with Distress Forest Moss and the words Inspire Yourself in black.


My journalling phrase is from Leonardo da Vinci:

"I have been impressed with the urgency of DOING. Knowing is not enough, we must APPLY. Being willing is not enough, we must DO!"


Lastly, I added a few stencilled butterflies and spatters.

What do you think of my first ever journalling page?  I guess all those classes and YouTube videos did come in handy.  I plan to fill the whole 60 pages with art journal spreads so stay tuned for more!

Have a great day!
NancyD


Sunday, January 17, 2016

Tangle Island 2016 Workshops

I am happy to announce that there will be two workshops this year at Tangle Island.  They will be held at the MacMillan Arts Centre in Parksville, BC on June 4-5 and Oct 1-2, 2016.

Check out the Tangle Island website for registration details.


Jerryann Haggart, CZT 12 and myself, Nancy Dawes, CZT 13, are teaching beautiful background techniques with Twinkling H2Os and Tombow Dual Brush Pens, 10 special tangle patterns while we make a hand-sewn watercolor booklet.  You will learn to draw gorgeous butterflies and dragonflies too!

Check out the information on our Tangle Island website and register before it is too late.  Space is limited to 25 tanglers.

Happy Tangling!

Tuesday, December 29, 2015

December Musings and Art Homework

Hhmm, December is almost over and I see that I did not post anything this month.  I realize that is a bit unusual for me considering that since I started blogging in January 2011 I have made 15-20 posts per month for most of that time.

In 2014-2015 I gradually let go of all my design team commitments and focused on my work, family, and learning more about drawing and art in general.  I also teamed up with a wonderful group of Certified Zentangle Teachers (CZTs) on Vancouver Island and we put on a fabulaous weekend retreat for Zentangle enthusiasts. For those who are interested, we will be announcing the Tangle Island retreat plans for 2016 on January 17th.

If you have read my other posts about the online classes that I am taking then you already know about Jane Davenport and Joanne Sharpe.  You might be interest in Joanne's Artfully Inspired Life 2016 classes that will begin January 1st.

Here is my latest homework from Joanne's Whimiscal Lettering class:


Each one is made with a different font emphasizing something that I am grateful for.  Each of the fonts and techniques is taken from Joanne's book, The Art of Whimsical Lettering. I added my own doodles and drawings.

I listed the family members on the letters that came to mind when I made the family tag.

My sons names are printed on the slop of the letters.
 There is much more I am grateful for that isn't reflected in my font practice.  For this exercise I used pre-purchased tags, twinkling H2Os, gel pens, Tombow Dual Brush Pens, Sharpie pens, and Peerless watercolors.

Have a wonderful day!

Monday, November 30, 2015

Winter Scrapbook - Half Page Mini

I have been working on a winter scrapbook album to put all of our snow related pictures. I can honestly say that I was an adult (about 20) before I actually saw snow falling from the sky.  I grew up in the San Francisco Bay Area where the temperatures are mild most of the year.  When my family went to play in the snow (about 4 hours away), the snow was already on the ground.  So, as you can imagine, snow is a big deal to me!

I have already started to put our snow pictures in this album and I plan to bring it out to the coffee table at this time of the year so that we can look at and remember all our snow adventures.  There is still space for more pictures and I can't wait to capture our next snowy trip.


This is Paper Phenomenon's June bonus project the Half-Page Mini.  It is 8 1/2 by 10 inches with large pull-out pages for lots of pictures.


The paper collection is from BoBunny - Sleigh Ride.


What you cannot see in these pictures is that the half-page is a pocket and a large folded insert nestles in the pocket.  Here are a couple of those inserts open.


Check out this great tutorial from Kathy Orta on her site Paper Phenomenon.

Have a scrappy day!
NancyD

Thursday, November 12, 2015

Teaching is a Privilege!

Teaching really is a privilege!

When I teach I also learn.  I probably learn more than the students do in class. Why? Because I have to teach myself (or learn from others) whatever process or technique I am going to share.  I need to have experienced it for myself and know how it feels, looks, tastes (maybe not), smells, and sounds. When I can do all that I think that I might have enough knowledge to actual impart the technique to others. Even with all that preparation I often am still learning as I share the technique with others.  My students teach me too! This wonderful process of learning, sharing and learning more is what I love, love, love about teaching.

This fall I have been focusing on shading Zentangle because I want to improve my skill AND because I was scheduled to teach a 4-week class at North Island College to a group of eager and attentive seniors. I have already shared with this audience some of my samples, but today I would like to share those of the students.

First we learned to draw freehand a pumpkin string and then fill it with tangles.  Next we shaded the tangles and the pumpkin roundness.


Another lesson was about light source and we focused on adding great shadows.


Another lesson included adding dimension by the shape and direction of our line before adding shading.


and finally, we explored shading with coloured pencil using three shades of the same colour.


I had a wonderful time and while I was learning more about shading I was also learning more about teaching.  
Any comments you make about this post will be shared with my students.  Thanks for stopping by and as always have a great day!

NancyD


Tuesday, November 10, 2015

Drawing, Drawing, Drawing and Lettering

Two years ago I Google'd "drawing programs" and headed into the direction of Zentangle drawing. "Why," you ask? My answer is, for three very important reasons:

  1. I never doodled as a child - never!  I know this doesn't seem possible, but I didn't adulterate the sides of my papers in school.  I have wondered if it was discouraged or if I got into trouble for having done it.  I don't really remember, but anything that did not lead to concrete eduction was discouraged.  Things like art and music were set aside in favour of math and science.  I think my mother was trying to create something, and she did, but it wasn't someone who would follow the artistic path.
  2. I wanted to learn to draw characters.  I was (and still am) heavily involved in creating cards with lovely digital and rubber stamped images of people and creatures.  I love to place them in interesting settings and colour with Copics or Tombows.  I thought that it would be great if I could create and sell my own unique characters as digital images. If I could only draw!
  3. Zentangle looked cool!
Fortunately for me, Barb Round from Campbell River was teaching a beginners class in my town within 2 weeks.  I was delighted!  Finally I would learn to draw!  I took her beginner series of three classes and then took two more she offered over several weeks.  I embraced Zentangle wholeheartedly making dozens of tiles and finally deciding that I wanted to be able to teach this method to others. In November 2013 I flew off to Road Island for Certified Zentangle Teacher training and became an official CZT.

I love Zentangle!  It has opened my mind to other creative techniques such as using colour in Zentangle and even creating what we call ZIA - Zentangle Inspired Art. My hand - eye coordination has improved as well as my handwriting.  I finally feel free to be creative and draw - freely draw with no constraints.  I feel that Zentangle has opened my creative mind to be more artistically expressive.

There is just one problem!  I would still like to learn to draw things such as trees, animals, landscapes and people. This is a long background story to tell you that I was back to the Internet and found a couple of online courses for drawing and lettering that I would like to share with you.  Actually, this little journey started after viewing one of my favourite YouTube friends, Sara from My Serenity Crafts (check her out!).

First, Jane Davenport from Australia has a wonderful set of classes - very low key and fun, on supplies and drawing, including drawing faces.  I absolutely love her style and happy, colourful presentation.  I started with her supplies class because I don't very much about all the different types of paint, markers and watercolours.  She goes into depth and makes us students try them out to see what they do - very experiential.  Here are a couple of pics from the early sessions ......

We are cataloguing all the art supplies that we have on hand.

Gelly Roll Pens on Black Gesso and cardstock
Then she has us drawing our happy place. I am looking forward to comparing this drawing to a future version. My happy place is in the tall grass around the tall trees in my grandfather's apple orchard when I was 4-6 years old.


The second class that I am taking is actually a book and book club on Facebook.  Joanne Sharpe's book The Art of Whimsical Lettering is amazing and helpful!  We are currently working on sampling alphabet styles.


And we have tested some of them ...


I have a long way to go and I am very much enjoying the journey.  Please check out the links above and see if these classes are of interest to your creative journey. I will be sharing more as the weeks progress.

Have a great day!
NancyD